SOME ANATOMY TO BEGIN: To more accurately find subscapularis tears we need to have a good understanding of the anatomy of its insertion. These are the key landmarks for understanding the insertion.
- Lesser Tuberosity ( Blue arrow in image below).
- Bicipital Groove ( Green arrow in image below).
- Surgical Neck of Humerus ( Yellow arrow in image below).
Image adapted from Subscapularis Footprint Anatomy Revisited with a 3-Dimensional Perspective and its Relationship with the Supraspinatus Yoo J C et al
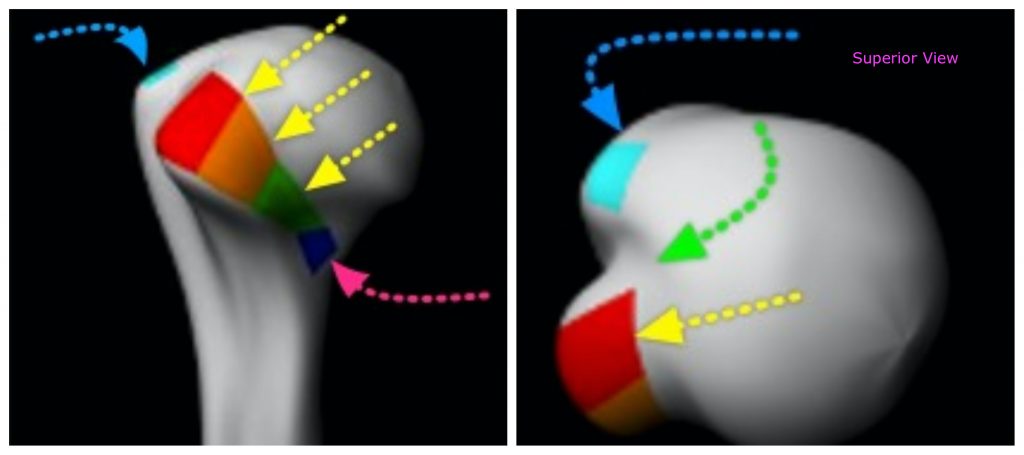
The important things to note from the anatomy we can use in imaging
- Subscapularis tendon inserts onto the Lesser Tuberosity ( yellow arrows) and a smaller portion on the surgical neck ( Pink arrow).
- The tendon insertion occupies the entire lesser tuberosity ( So on MRI between the tendon and bone there should be no fluid from the joint space).
- The Insertion is broadest superiorly ( this is also where most of the tears occur).
- The Bicipital Groove ( Green Arrow) forms the lateral margin of the insertion.
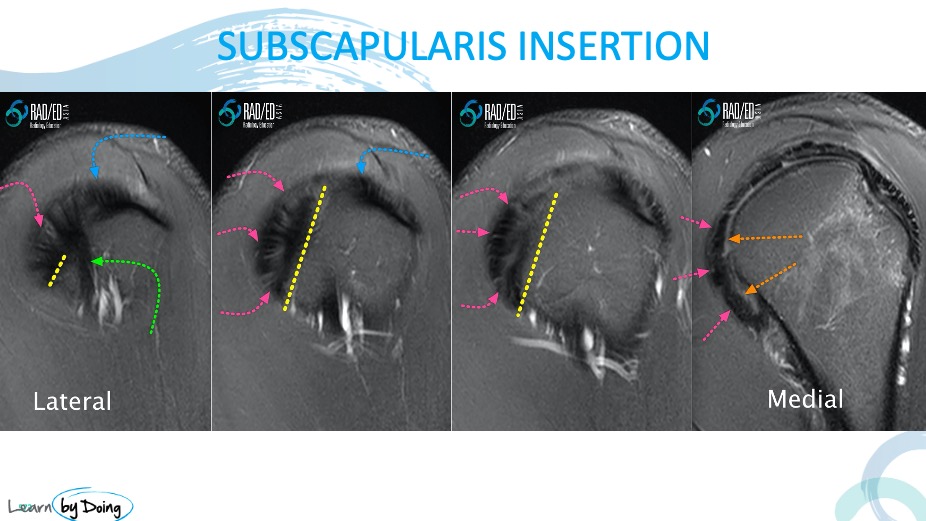
SUBSCAPULARIS WHAT AND WHERE TO LOOK FOR:
- Start with a sagittal PDFS/ T2FS scan lateral most aspect.
- Find the Biceps tendon ( Green Arrow) in the bicipital groove.
- On the next slice the anterior aspect of the humerus will have an oblique configuration ( Yellow Dashed Line) . This marks the beginning of the Lesser Tuberosity where Subscap inserts ( Pink arrows).
- There should be NO fluid signal between subscapularis tendon and bone. If there is fluid = Tear.
- As you keep going medially Subscapularis tendon will lift off bone and fluid will be seen deep to it ( Orange Arrows) which is normal joint fluid.